
Basic Configuration Mikrotik Router

Make sure you have download Winbox from mikrotik site and plug MT Router power adapter into the power socket. Open the winbox and login with username admin and blank password. After that follow up below process for Basic router configuration.

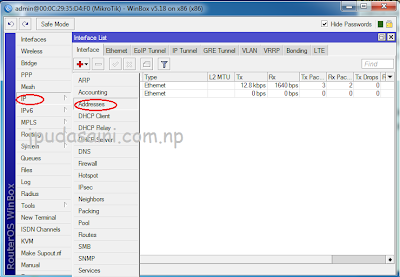
Setp 1: Click on IP>Address>click Plus sign. Then Add IP address like below.

Type WAN IP here(IP provide by your ISP) and choose WAN interface.
Step 2: Again click On plus sign and add LAN IP and choose LAN interface.
Step 3: Add DNS, Click on IP>DNS>type ISP provided DNS here(I use open DNS ).
Step 4: To add route, Click on IP>Routes>click Plus sign, Add Your ISP's gateway here.
Step 5: NAT, Click on IP>Firewall>Click on NAT> click on + sign.
Choose <srcnat> Out. interface<WAN port> Apply>OK
On Action tab, choose masquerade>Apply and OK.
Step 6: Setup DHCP, IP>DHCP server>DHCP Setup>
Now follow up onscreen process.


<On this field Choose Your ISP DNS server> 
Now your router is ready to use.
Enjoy


Comments

  1. .see more mikrotik router configuration example http://mikrotikroutersetup.blogspot.com

    ReplyDelete
  2. Hello,
    There is requirement is to run the DATA & Internet on two computers at
    the same time via Mickrotik Router. Can you please confirm that is it possible on Microtik router?? Appreciate, if you can share step by step configuration for the same.
    LAN IP Pool (For Data) : 192.168.3.0/24
    IP Pool for Internet: 203.130.17.224/30
    WAN IP Pool: 192.168.110.52/30
    For Data connectivity we have already made GRE tunnel b/w branch & Head Office
    Tunnel Ip@ branch end router: 10.10.10.6
    Tunnel Ip@ HO router: 10.10.10.5
    Tunnel Destination: 10.50.55.162
    LAN IP Pool@HO: 192.168.10.0/24

    ReplyDelete
  3. @Stylish
    Sir, There is a difficulty to understand your problem, sorry my native language isn't English. However, according your setting (if I understood right, what you gonna do) your need is to data & internet connection through Gre as well as data connectivity mustn't be b/w restriction. If so then you need to bypass local IP in your queue setting using mangle. If that so do reply I'll make another post for the same.

    ReplyDelete

Post a Comment

Popular posts from this blog

MongoDB Failed to start lsb an object/document-oriented database

After long gap I'm going to post new blog. Due to the work load and research I have little time.  MongoDB could not started after installation of 3.6 version, However downgrade to the 3.4, still the Mongodb couldn't start and show below error message. Search don't help to resolved the issue. After so much hit and trail nothing work. One Chinese forum posted this command and its works for me.  cd /var/lib sudo rm -rf ./mongodb sudo mkdir mongodb sudo chown -R mongodb mongodb/ sudo serivce mongodb restart

Juniper switch Basic Configuration Commands

Hello fellow blog reader, after long gap I'm going to write this thread regarding the basic Juniper command and configuration. I try to include as much as troubleshooting/configuration command during day to day work. I would like to thank to Srijan pointing the error on LACP command. 1. Set username for login root@jpudasaini#set system root-authentication encrypted-password New password: Retype new password: root@jpudasaini#set system login user jay full-name jaypudasaini uid 400 class super-user authentication encrypted-password 2. Hostname configuration. root@switch#set system host-name jpudasaini root@jpudasaini# 3. Set Tacplus authentication for juniper switch. root@jpudasaini# set system authentication-order tacplus root@jpudasaini# set system authentication-order password root@jpudasaini# set system root-authentication encrypted-password "you password here" root@jpudasaini# set system tacplus-server 10.10.10.10(your tacplus server IP) secret &quo

IOS XR GNS3 QEMU

This time lets have tutorial on Cisco XR 9k series router image running on the GNS3. Please don't ask for the XR image. Your are smart enough to get it. My system configuration: Ubuntu 16.04 GNS3 1.4 RAM 8Gig i7 processor Used XR Image iosxrv-k9-demo-6.0.1.qcow2 This image is VIRL extracted image. You need to convert this image into QEMU image, follow this link I strongly recommend you to run it on the Linux system. Now you have converted image, then go to the GNS3>Edit>Preferences>QEMU>Qemu VMs>New then follow the onscreen procedure. Setting for QEMU XR Image. RAM:- 4Gig CPU:- 1 Adapters at lest 4.  -enable-kvm Here you can see I can run the XR on my system. Interface is up and system is already booted.  I have run 3 XR router  here is my system RAM CPU usages. RP/0/0/CPU0:XR3(config)#int gi0/0/0/0 RP/0/0/CPU0:XR3(config-if)#ip add 192.168.13.2 255.255.255.252 RP/0/0/CPU0:XR3(config-if)#co